 Show / Hide
Image Viewer
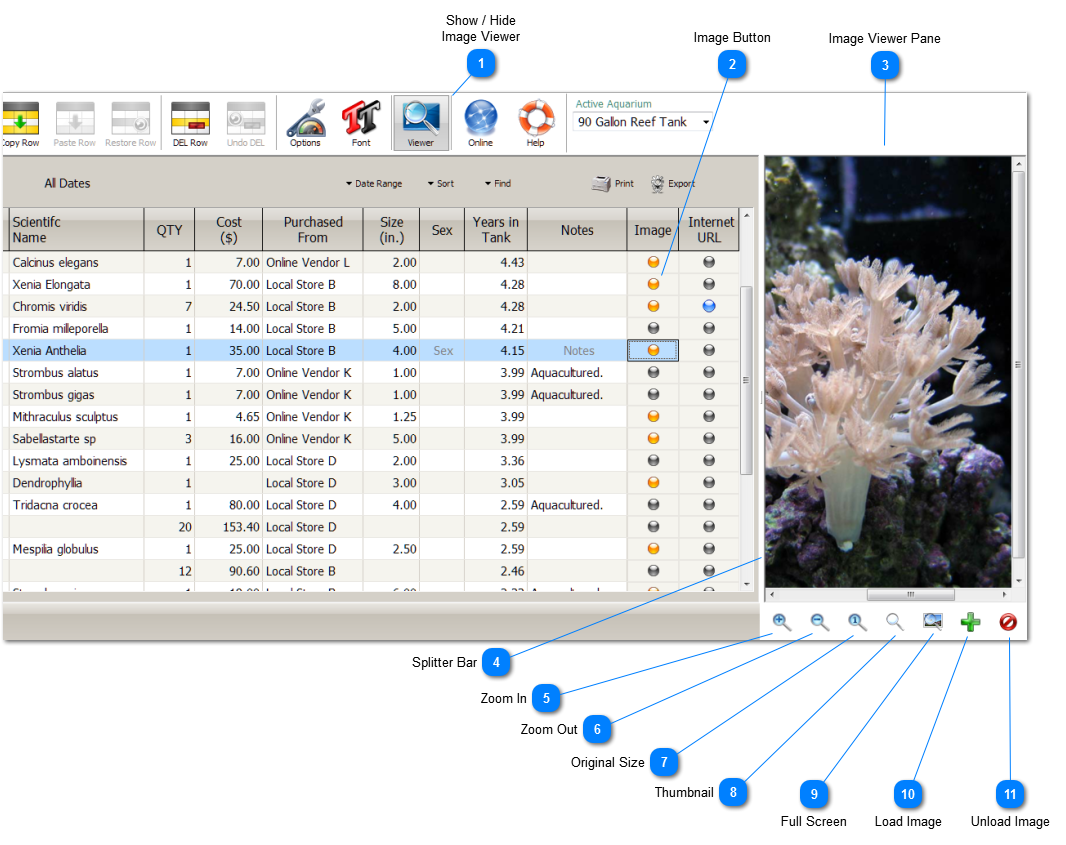
Show or hide the Image Viewer.
|
 Image Button
Clicking the Image Button, or pressing the SPACE BAR when the Image Button is the Selected cell, opens the Image Viewer. To close the Image Viewer, press the Viewer Toolbar Button.
The Image Button has an LED indicator. When the LED Indicator is lit, it means there is an image available for viewing. This is a visual cue that is useful when the Viewer is closed.
|
 Image Viewer Pane
If the Image Viewer is visible, moving to a row with an image automatically displays the image.
|
 Splitter Bar
When the Image Viewer is open, a vertical Splitter Bar is visible. To change the width of the Image Viewer, grab the Splitter Bar with the mouse and drag it to the left or right. You can not make the Viewer more narrow than the Viewer's Button Bar.
|
 Zoom In
Enlarges the image.
|
 Zoom Out
Reduces the image size.
|
 Original Size
Resizes the image to its original size.
|
 Thumbnail
Resizes the image so that it fits completely within the viewer.
|
 Full Screen
Invokes the Windows Photo Viewer. Here you can view the image in full screen, or print the image.
|
 Load Image
Choose an image to load into the Viewer. Once you choose a new image, any image already in the Viewer will be replaced with the new image.
Note: BlueChromis does not store the image itself. Instead, the location of the image is stored. If you move the image file or rename it after you load it into the Viewer, it will not display.
|
 Unload Image
Removes an image from the Viewer. This does not delete the image from your computer.
|
|
