
Quick Start Guide
Three Steps To Get Up And Running
STEP 1 Have Fun with the Example Aquarium
BlueChromis comes with a fully functional Example Aquarium using data from a marine aquarium. You see the Example Aquarium the first time you run BlueChromis.
We recommend that you familiarize yourself with BlueChromis by spending some time exploring the Example Aquarium. All the forms in the Example Aquarium contain meaningful data. This gives you a point of reference that makes it easier to understand BlueChromis. Other software confront you with blank screens that can leave you uncertain how to use them.
Using the Example Aquarium may give you ideas on how you might like to set up your aquarium. And, of course, having some knowledge of how BlueChromis operates will get you started more quickly after you create an Aquarium for your tank.
If you like the way the Example Aquarium is set up, you can copy its settings to your aquarium when you create it. BlueChromis can automatically set up the Activity Types, Activity Definitions or Memorized Activities based on the Example Aquarium (see STEP 2). Once copied, you can change them to suit your particular needs before you start entering data for your tank.
The Example Aquarium feature is unique to BlueChromis.
STEP 2 Create a New Aquarium
You create a new BlueChromis Aquarium for each aquarium that you wish to manage. This defines the database for each aquarium.
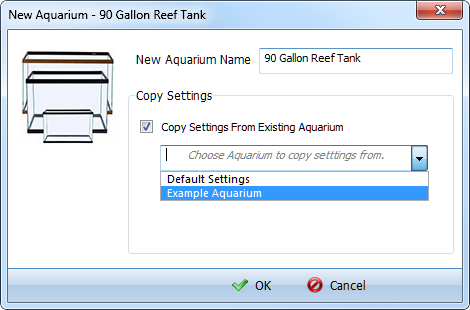
1) Open the New Aquarium window by choosing New Aquarium from the File menu or pressing CTRL+N from the keyboard. Enter a name for the Aquarium.
2) To copy aquarium settings, check Copy Settings From An Existing Aquarium, and select either Default Settings or Example Aquarium. This is the easiest way to get started.
Selecting Default Settings copies the Example Aquarium's Activity Types and Activity Definitions that were in effect when BlueChromis was installed.
Selecting Example Aquarium copies Activity Types, Activity Definitions and Memorized Activities, including any changes you may have made to the Example Aquarium settings.
If Copying Settings is left unchecked, you will start the new aquarium with a clean blank slate.
3) Click OK to create the Aquarium.
After creating the aquarium, BlueChromis will open the Aquarium Settings window (Step 3). Here you can add or edit various settings.
STEP 3 Configure the New Aquarium's Settings
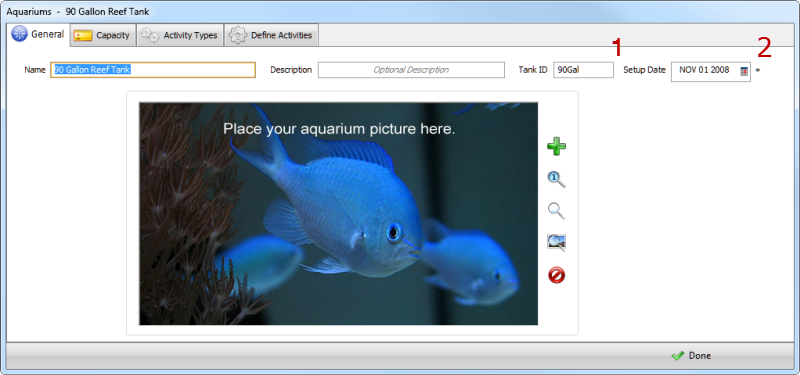
1) Enter a Tank ID. The Tank ID should be as short as possible, yet descriptive. It is a short name for your aquarium. It is used by the Calendar.
2) Enter the Setup Date, the date your aquarium was established.
3) You have the option of displaying a picture of your aquarium. Click the Load Image button (green plus sign) to upload your photo.
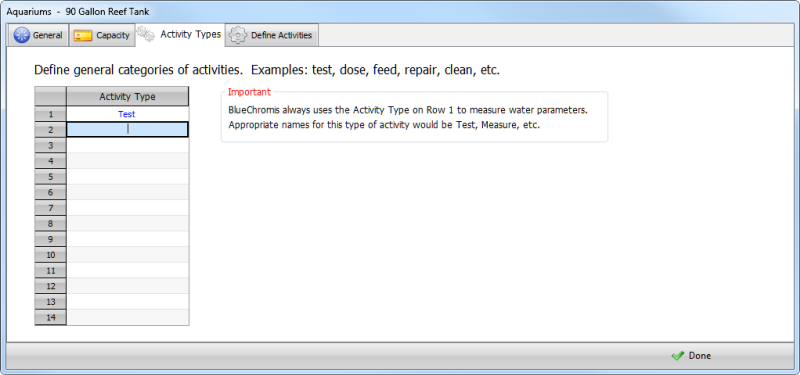
4) Define Activity Types. An Activity Type is a broad category of Activities, such as Measure, Test, Add, Dose, Clean, etc.
The first Activity Type is reserved for the category used to measure water parameters. You can change its name, but you can not delete it. To add an Activity Type, type the name of the Activity Type, then press the ENTER key to save it and move to the next empty row.
If you copied an aquarium's settings, the Activity Types tab will look similar to this.
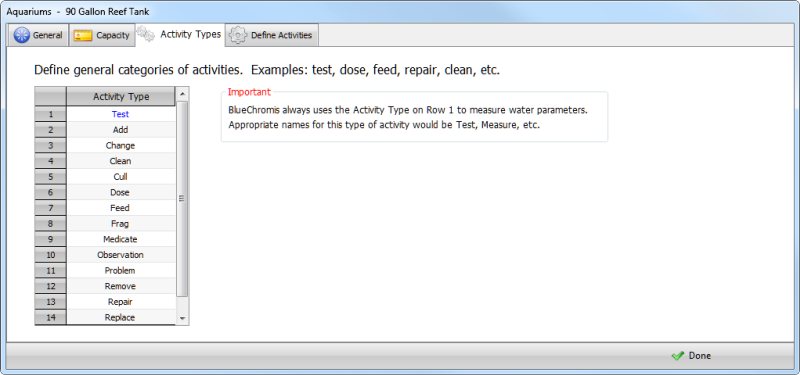
You can change Activity Type names, add new ones or delete those that you will not need. Right click on a cell to see a context menu with edit options.
5) Define Activities and set related attributes such as units of measure, decimal precision, water parameter values.
An Activity is anything you do in regard to your aquarium. Examples might be Test Temperature, Replace Lights or Dose Calcium. For each Activity, you can also indicate if the Activity should be available to Plot, and you may choose a color for that Activity. Checking Plot makes that Activity available for graphical and tabular analysis.
To add an Activity Definitions, enter row data, then press the ENTER key to save it and move to the next empty row.
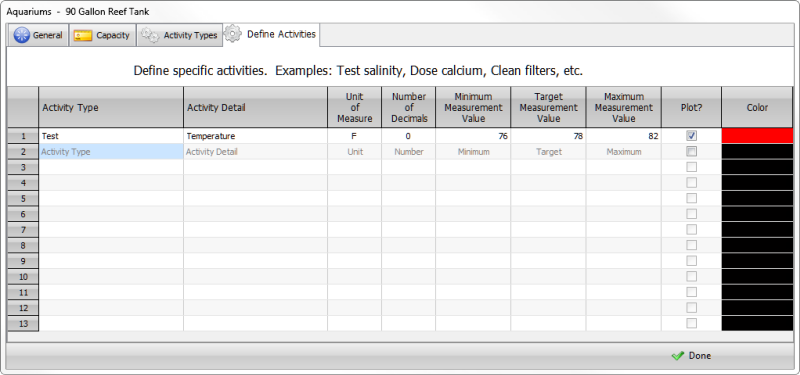
If you copied an aquarium's settings, the Define Activities tab will look something like this.

You're now ready to begin managing your aquarium.